Understanding Spray Foam Insulation
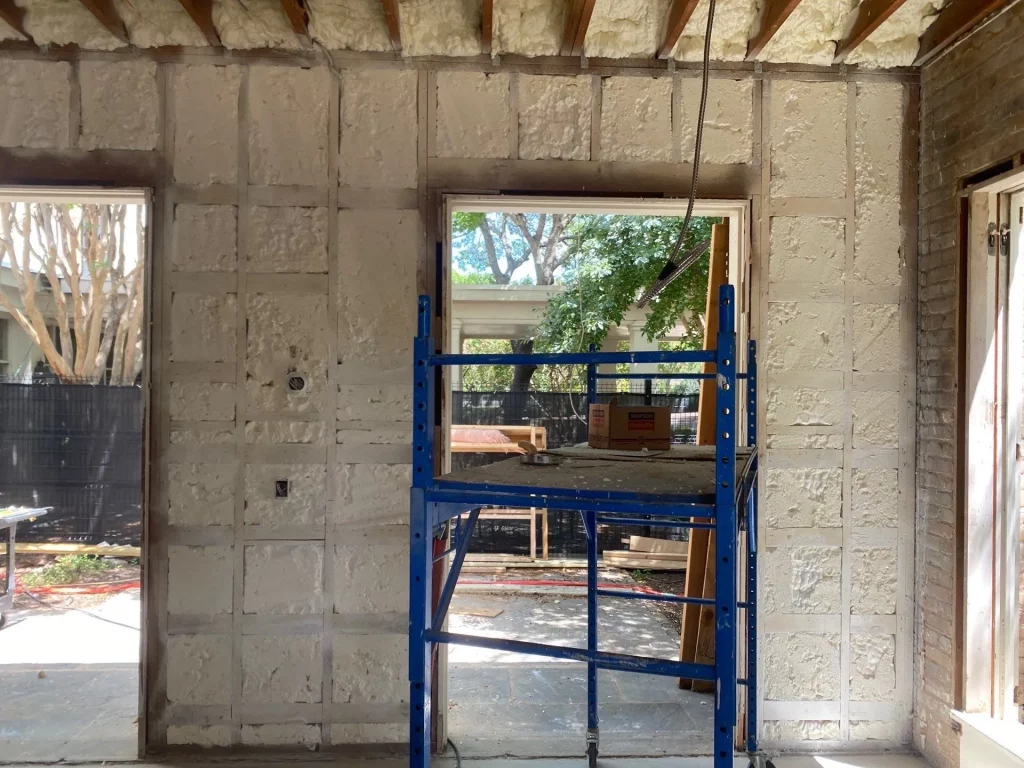
Spray foam insulation is a high-performance solution for improving a home’s energy efficiency, air quality, and structural integrity. Unlike traditional insulation materials such as fiberglass or cellulose, spray foam expands upon application, sealing gaps and preventing air leaks. This airtight seal enhances thermal performance and reduces energy costs. Proper preparation ensures that the installation process is smooth and maximizes long-term benefits.
Steps to Get Your Home Ready
1. Assess the Areas to Be Insulated
Before installation, identify which areas of the home will receive spray foam insulation. These typically include:
- Attics
- Crawl spaces
- Walls (new construction or retrofit)
- Basements
- Garages
A professional assessment can help determine the appropriate type and thickness of spray foam for each location.
2. Clear the Work Area
Spray foam insulation requires unobstructed access to the surfaces being insulated. Homeowners should:
- Remove furniture, personal belongings, and storage items from the workspace.
- Detach wall coverings, if necessary, to expose open cavities.
- Ensure that attic and crawl space entries are easily accessible.
3. Protect Fixtures and Surfaces
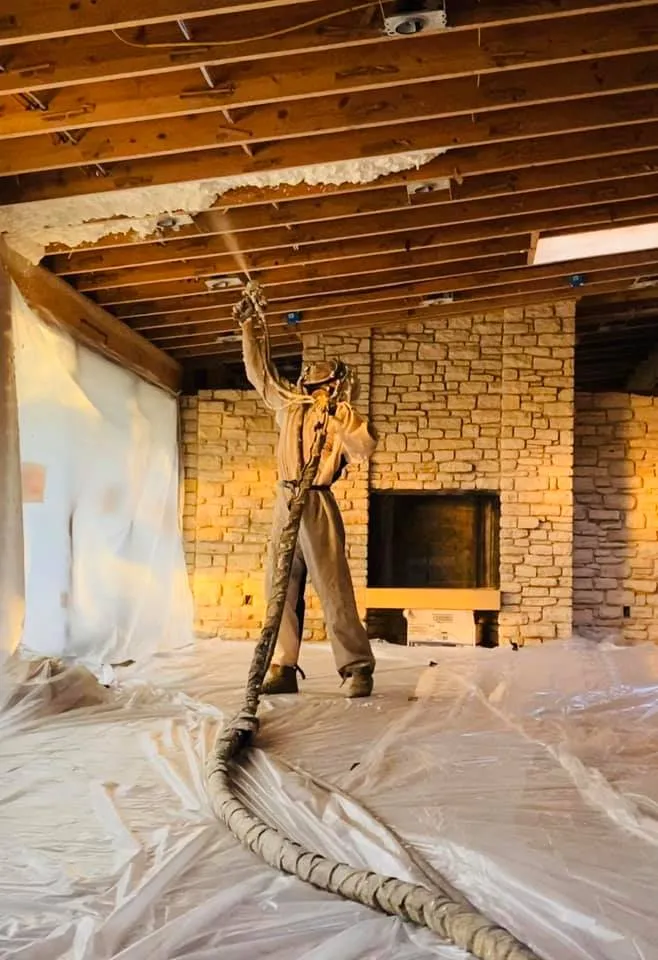
Since spray foam expands rapidly, it can adhere to unintended surfaces. Precautions should include:
- Covering floors, windows, and doors with plastic sheeting.
- Using painter’s tape to protect electrical outlets and switches.
- Relocating sensitive equipment, such as electronics and HVAC components, away from the work area.
4. Plan for Temporary Relocation
Spray foam emits chemicals during the curing process, which can cause temporary respiratory irritation. To minimize exposure:
- Vacate the home for at least 24 hours after installation.
- Arrange alternative accommodations if insulation is applied in large areas.
- Keep pets and vulnerable individuals away from the site.
5. Ensure Proper Ventilation
Ventilation plays a critical role in ensuring a safe installation process. Homeowners should:
- Open windows and doors when possible.
- Use exhaust fans in affected areas to help dissipate fumes.
- Allow fresh air circulation before re-entering the home.
Addressing Electrical and Plumbing Considerations
6. Inspect and Adjust Electrical Systems
Spray foam can seal around wiring, making future modifications difficult. Before installation:
- Confirm that all electrical work is completed and up to code.
- Upgrade or reroute wiring if necessary.
- Ensure that junction boxes remain accessible.
7. Check for Plumbing and Moisture Issues
Sealing moisture inside walls can lead to problems such as mold growth. Steps to take include:
- Repairing any leaks before applying spray foam.
- Installing vapor barriers where needed.
- Consulting a contractor about appropriate moisture management techniques.
What to Expect on Installation Day
8. Coordinate With the Installation Crew
Professionals will arrive with specialized equipment to apply the spray foam. Homeowners should:
- Confirm the scope of work and timeline.
- Provide access to the designated insulation areas.
- Review any last-minute safety precautions with the crew.
9. Monitor Temperature and Humidity
Environmental factors impact how well spray foam adheres and cures. Recommended conditions include:
- Temperatures between 60°F and 80°F.
- Low humidity levels to prevent condensation issues.
- Dehumidifiers or fans if necessary to maintain optimal conditions.
Post-Installation Considerations
10. Allow Proper Curing Time
Spray foam typically takes 24 hours to fully cure. During this period:
- Avoid direct contact with insulated surfaces.
- Keep windows open to expedite off-gassing.
- Monitor for any unusual odors or persistent fumes.
11. Conduct an Inspection
After the insulation has set, verify that all areas were properly covered:
- Look for missed spots or uneven application.
- Confirm that no electrical or plumbing components were accidentally sealed off.
- Test air quality to ensure safe re-entry.
12. Restore Your Living Space
Once the foam has cured and been inspected:
- Remove protective coverings and clean up debris.
- Reinstall fixtures, furniture, and stored items.
- Seal any remaining wall openings or cavities.
Professional Assistance for Best Results
Spray foam insulation is a long-term investment in comfort and energy efficiency. Professional installation ensures proper application, safety, and performance. If you’re considering this upgrade, Stellrr provides expert guidance and reliable service. Contact us at (512) 710-2839 or email info@stellrr.com to discuss your insulation needs.
FAQs
1. How long does spray foam insulation last?
Spray foam insulation can last for the lifetime of a home if installed correctly, typically 50 years or more.
2. Can I stay in my home during the installation?
It is recommended to vacate the home for at least 24 hours due to chemical off-gassing.
3. Will spray foam affect my indoor air quality?
Once fully cured, spray foam improves indoor air quality by sealing out pollutants, allergens, and moisture.
4. Does spray foam insulation require maintenance?
No routine maintenance is needed, but periodic inspections help ensure long-term effectiveness.
5. Can spray foam be installed over existing insulation?
Old insulation should be removed to achieve the best results. Spray foam works most effectively when applied directly to clean surfaces.
6. Is spray foam safe for my electrical wiring?
Yes, but any necessary electrical modifications should be completed before installation, as foam makes future wiring adjustments more difficult.
7. How does spray foam compare to fiberglass insulation?
Spray foam offers superior air sealing, moisture resistance, and longevity compared to fiberglass.
8. Will I see an immediate reduction in my energy bills?
Energy savings may take a few months to become noticeable, depending on insulation coverage and overall home efficiency.
9. Does spray foam insulation attract pests?
No, spray foam does not provide a food source for pests and helps deter rodents by sealing entry points.
10. Can spray foam be applied in all weather conditions?
Installation should be done in moderate temperatures and low humidity to ensure proper adhesion and curing.


