Whenever the summer season kicks in, we must ensure our homes are properly insulated to keep the cold draft outside so our loved ones stay toasty.
Some people are bent on doing it themselves with a Spray Foam Kit they buy at Home Depot or Lowes. But, frankly, any professional sprayer would advise against the kit and against renting a high-pressure foam rig to try and DIY.

And Professionals advise against it, not because they want to earn money. Instead, they say it should not be done because: spraying foam is like running a chemistry lab at home.
It is very serious stuff. And if you make a mistake, it could make your home unlivable.
Where can you DIY with foam kits?
Spray foam insulation kits may provide a solution for a quick do-it-yourself project at home, like insulating a small wine cellar that is too small for a company to take on. Or a single wall cavity that had been opened up, you could use a kit on that.
Or if you have new construction and they are doing batt insulation, you could spray the penetrations and seams inside before the batt insulation goes in. Then, you block the airflow (convective heat), and the batt installer stops the conductive heat transfer.
But, for those who want to understand Foam Kits for DIY, here is what you need to know.
Before opting for spray foam insulation kits, let’s take a deep dive to unearth what you might need to know. With this knowledge, you can make the right choice that adds value to your home.
What are spray foam insulation kits?
Outdoor temperature variations can drastically affect any home—wall, attic, and crawlspace insulation work by guarding against the effects of the changing seasonal environment.
Similarly, spray foam kits help keep the air indoors from escaping or outside air from breaching your home. In so doing, spray foam protects against extreme cold or heat while also attempting to keep out pesky critters.
Let’s talk R-value
Insulation material is usually labeled as R, followed by a number from 1 to 60. What does such labeling denote? For starters, R stands for the resistance a specific material offers against heat transfer. For instance, during winter, a high R-value prevents cold drafts from entering your home, keeping your haven warm.
The walls should guard against heat transfer in hotter months by keeping your interior space cool. As such, a higher R-value implies greater resistance to heat transfer.
But what you need to understand is Prescriptive Code requirements vs. Performance code. I’ve written an entire article about it on my Stellrr website.
The bottom line is that the prescriptive code requirement in Austin is R-49 in the attic. Prescriptive means the R-value as the code was written for blown insulation.
While the performance code means the R-value required on a product to meet or exceed the written prescriptive code. So in Austin, the performance code is R-25 in the attic. Spray foam insulation is measured by the performance code, not prescriptive.
How is spray foam at least twice as effective as the prescriptive code for blown fiberglass/cellulose/rock wool?
For starters, spray foam is the only solution that blocks all three types of heat:
- Radiant
- Convective
- Conductive
Whereas blown insulation stops conductive heat only.
Next, spray foam takes your attic ductwork outside the building envelope (in a 130-degree attic). Finally, foaming the underside of the roof brings the attic ductwork inside the building envelope.
We call this a semi-conditioned attic. And now your HVAC unit is in an environment that makes air duct leakage irrelevant. And the attic is 5-10 degrees warmer than the inside of your home, meaning your ductwork can maintain the air temperature much better.
So when that 55-degree air comes out of the air handler in the HVAC system, it runs through a 75 – 85-degree attic (not 130 degrees).
That means that the room at the far end, away from your air handler, can receive 55-degree air instead of running through “reheating lines” in a traditional attic.
There are 13 crucial steps to properly cleansing your attic from where it is to transform it into a space-age style attic (think NASA space ships foam insulation). First, how do you manage the humidity after the HVAC isn’t running as much, which means it is not pulling as much moisture out of the air? How do you solve that (and nobody is addressing this besides Stellrr)?
I won’t publicly go through the 13 steps because I don’t want my competitors to sound competent and totally botch the work we specialize in (retrofits on existing homes). However, we discuss the 13 steps during our Diagnostic Consults when reviewing potential projects.
What is another downside of DIY foam kits?
Foam Kits and high-pressure foam rigs (like we use) start in two separate containers. Like in chemistry class, when the two meet, they react, growing 30 times. And during that reaction, it puts off a vapor.
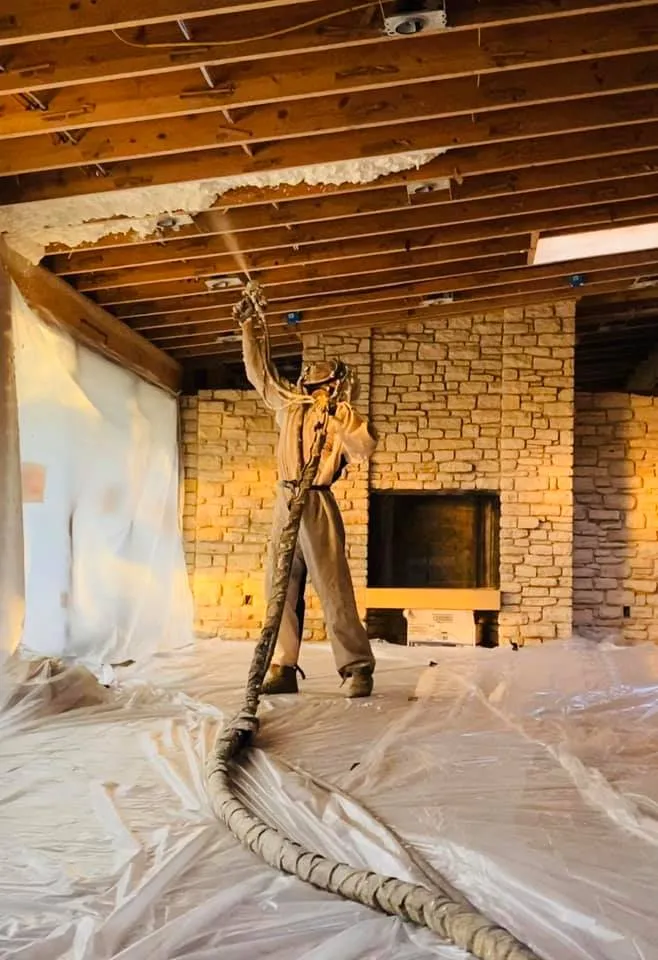
So you would be directly exposing yourself to that chemical reaction. Our installers wear Moon Suits, full-face respirators with supplied fresh air. You have to have the proper PPE.
The foam becomes inert (harmless) within a minute, and as soon as the vapors settle, you are good. Depending on the foam brand, you could wait 72 hours to re-enter the space. Or if you use a super green foam like we do, with proper ventilation, people can re-enter the area in as soon as 4 hours. But most foams are 48 hours.
How much foam do you need in a Kit?
It is pretty simple. Foam is measured by the board foot. So imagine a piece of plywood that is one inch thick. Now cut that plywood into a 12”x12” piece. That is one board foot. 1”x12”x12”.
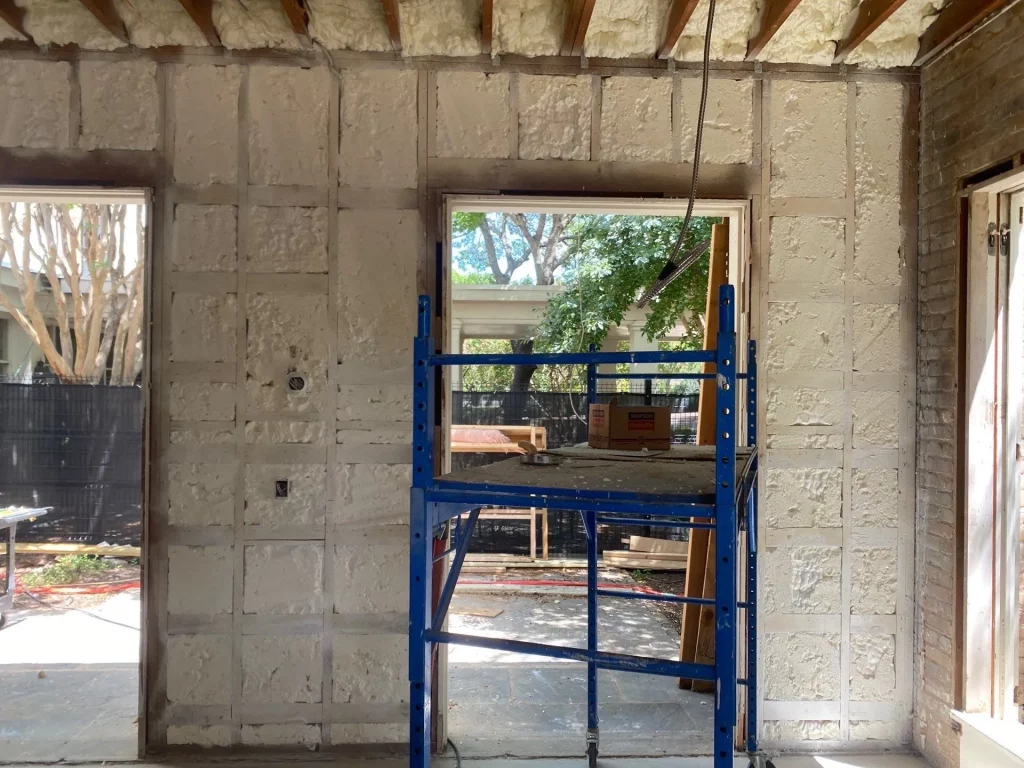
So to spray a closed cell (R-6.7 per inch) kit in a wall cavity, you would need two board feet (R-13 Austin performance code). Two board feet per one square foot of wall space. So to properly insulate a wall to an R-13 closed cell, you need 21 board feet of material (16” wide, 8’ tall, 2” thick). The open cell requires more board feet because the R-value is closer to R-3.9 per inch. But nearly all DIY kits are closed-cell foam.
The DIY kits generally come in 100 bd ft up to 300 bd ft kits. So you could do five wall cavities 16” on center by 8’ tall. And the cost per board foot in the DIY kits is about the same price per board foot that a professional company would charge. So there aren’t significant savings in DIY.
Moreover, a 100 bd ft kit will have a lower yield. In a perfect test environment with a professional sprayer, the kit may achieve 100 bd ft. But in the real world, it could be as bad as 60 bd ft up to 90 bd ft at best.
A DIY kit can be as large as a small propane tank (2-4 gallons), whereas we use two 55-gallon drums and usually carry 4-6 drums in the rig with us to do a house (220-330 gallons).
What type of Personal Protective Equipment must you wear?
Personal safety is critical when working with chemicals. Invest in the right gear to undertake such a DIY project. For example, foam spatter can be difficult to scrape off once it cures, and we’re sure you don’t want it on you once the action begins. Some of the protective equipment you need include:
- A full-face respirator ($195) with the proper filters. Or a fresh air respirator ($3,000-$7,000) as we have.
- Disposable coveralls because the foam will get on you as it reacts and sticks. If you get an unprocessed A-side (one of the two parts) on you, it sticks like superglue to your skin. That is why we wear MoonSuits.
- Chemical-resistant gloves. Again unprocessed material and curing foam will get on you, guaranteed. So be prepared.
It would be best if you also protected the objects in the area where you are working. For example, grab some tape and plastic to cover windows and places to which you don’t want the foam to be misted or stuck.
Next, you’ll need a ducted fan to suck/blow out the building vapor from the chemistry reaction.
You will need several spare “guns” or “tips” because the kits will clog up quickly without an auto-cleaning mechanism. With our guns ($3,000 ea), we have air blowing out of the gun at all times, which cleans off the tip and helps prevent the material from crossing over (which means we have to clean (hours) and rebuild the gun with new o-rings ($100 o-ring kit each rebuild).
Fortunately, the DIY guns are much cheaper ($150 each), and you may only go through 1-2 per DIY kit.
Can foam be sprayed onto a wet surface?
It is common for crawlspace wood (floor decking and support joists) to be most from the moisture wicking up into your house from the dirt.
Foam will not correctly adhere to surfaces that exceed 18 percent moisture content. You can buy a moisture meter online for less than $50.
We prefer that the wood is in the 5 to 14 percent moisture content range. So wait until the substrate (surface) dries up before installing.
How easy is it to install foam with a DIY kit?
Let’s say that practice makes perfect. A new sprayer will take a year of spraying foam daily before they are decent at it. So I would not expect a good outcome from a DIY project. But it may be your only option.
If the space you need spraying is below a company’s minimum, consider what other area you’d like sprayed and have them do it too.
The bottom line is this: DIY spray foam kits are a fine concept. But it is a product that should not be on the market. Frankly, installing foam should be regulated by the Texas Department of Licensing. But anybody can call themselves a professional with no basis for the claim.
Here is what to do next!
You are welcome to call Stellrr at (512) 710-2839today for a free estimate! In addition, you can claim your Home Energy Audit, Thermal Mapping, and Blower Door Test ($297 Value FREE). Or download our e-book: Secrets to Making Your Home Comfortable & Energy Efficient (A $27 Value)! So you can make an informed and intelligent decision when hiring an insulation contractor near you! I’ll link our website in the comments for you.
Stellrr Insulation & Spray Foam,
401 Congress Ave, #1540 Austin TX 78701,
5125200044
Find us on Social Media
https://www.facebook.com/stellrr
https://twitter.com/stellrrinsulate
https://www.linkedin.com/company/stellrr-insulation/


